pg5hd.gif - 9Kb


pg5sub.gif - 6Kb

The installation and use of a pair of example scriptlets is explained on another page. This page is devoted to outlining how one of the the example scriptlets works. It should therefore serve two purposes. Firstly as a tutorial example of the commands and methods the scriptlets employ. Secondly, to show how a scriptlet can be used to perform a series of tasks in an interactive manner.

The scriptlet considered here is the one whose filename is “Fred”. This automates the process of creating textured text and applying a ‘soft edged’ shadow to the result. The scriptlet begins with the lines

#CompoScript
#cs_fred,pcs_fred
#Make textured shadowed text


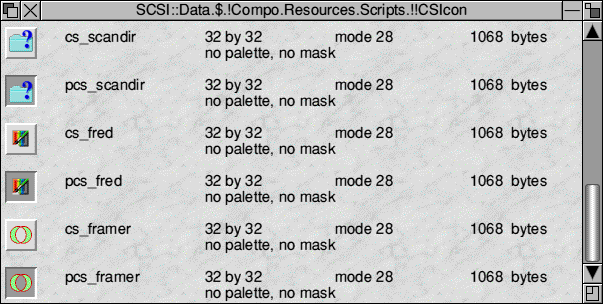
The first line confirms that the file (which like all CompoScript files is typed as “text”) is, indeed a series of CompoScript commands. The second line declares the names of a pair of sprites. These should have the general form shown where each sprite name is divided into two parts separated by an underscore “_” character. The sprite whose name begins with “cs_” is used as the button displayed on Compo’s scriptlets button-bar when the button is not being activated. The sprite whose name begins “pcs_” will be displayed to indicate when the button is being ‘pressed’. The second part of each name should be the same as that of the file holding the scriptlet. So in this case, since the scriptlet file is called “Fred”, the names finish with this. In order for the correct sprites to display they must be present in the sprite file, !!CSIcon which resides with the scriptlet files inside the !Compo.Resources.Scripts directory. The icons should be 32x32 pixels in size and nominally ‘mode28’ – i.e. 256 colour icons. The illustration below shows the sprite data you can obtain if you load the !!CSIcon file into !Paint.


The second section of the “Fred” scriptlet is as follows

prompt to texture
{
 Message:Choose a texture
 Button1:woven
 Button2:starlight
 Button3:blue
}


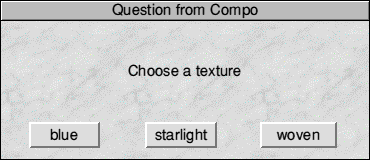
This command causes Compo to create and display a ‘prompt’ dialogue box of the form shown below


By comparing this with the script command it should be fairly clear what is going on. The “Message:” line is used as the message displayed in the prompt box, and the “Button” lines are used as the names on the three icon buttons. When the user clicks on one of these three buttons the same text is then returned as a result and placed into the named output variable whose name follows ‘prompt to’. So in this case the variable ‘texture’ is given a value equal to the text displayed on whichever of the three buttons the user selected.

This prompt box give the user a quick way to choose between a few options. However it isn’t much use if there are many options or if some of their names are long. For that a menu would be better. The script to create and use menus is explained on the webpage that deals with the other example scriptlet, “Framer”.

The next script command in the example scriptlet is as follows

input "" to result$ "Enter some text."


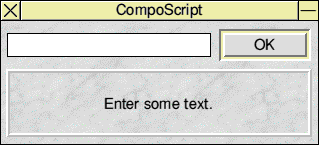
This produces an input window with a writable icon into which the use can type some text.


Once they then press the <return> key the text they have typed is stored in the variable (here “result$” is the chosen variable name) and the input window vanishes. Note that in this case the script starts “input "" to”. The pair of quote marks indicates an empty string. The “input” command can accept a default text which would be displayed in the writable icon and then used as the output if the user does not type in any changes. So, for example, “input "boo!" to result$” would display and return the text “boo!” to the script process if the user didn’t alter the displayed content of the writable icon. This can be useful in cases where you want to offer a preferred default value which can then be accepted by the user. Without a default text specified the script produces a window as illustrated above for the user to type in some text.

The scriptlet now knows which texture to use from the value in the “texture” variable, and which text to use from the variable “result$”.

To create an actual graphical object it must first choose a name for the object. Compo is broadminded and doesn’t insist that objects on the canvas must all have unique names. So it is quite possible to create a new object called something like “bunnyrabbit” even if some objects are already present which are also called ‘‘bunnyrabbit”. However if more than object has the same name it can make things awkward when processing since the ‘wrong one’ may be changed by mistake. For this reason it is often a good idea to ensure that a new object has a new name all of its own! This is what the next section of script is designed to achieve.

let txtxn = 0
let txtxok = 0

repeat

ifexists "txtx<txtxn>" then
 let txtxn = txtxn + 1
else
 let txtxok = 1
endif

until txtxok = 1


This first sets two variables to have initial values of zero. A “repeat... until” loop then begins and will run until the variable, “txtxok”, has its value changed from zero to one. Inside the loop, the script uses the “ifexists” command. This is a special form of the “if... then... else... endif” construct. It tests to see if an object of the specified name actually exists already on the canvas. Note that the name given to this for testing contains a pair of angle brackets. These indicate that the value of the contents should be used. Since “txtxn” is initially zero the first time this test is seen “txtx<txtxn>” is evaluated as meaning “txtx0”.

If an object called “txtx0” already exists, the if statement is true and the numerical value of “txtxn” is increased by one. If the object does not exist, then the statement is false and the line “let txtxok = 1” will be carried out. The results of the “ifexists” process are then presented to the “until” statement. If “txtx0” existed this will cause the script to jump back up to the “repeat”. Now, however, the new value of “txtxn” means that the “ifexists” will test to see if an object named “txtx1” exists. The process will then repeat, each time altering the object name being tested, until an unused name is found. The script can then exit from the loop.

As a result, each time the script is run, the loop will find a ‘new’ name in the series, “txtx0”, “txtx1”, “txtx2”,... etc. This can then used to give a unique name to the object to be created. Thus when we manipulate the object we can be confident that we are working on the correct graphical object. This process may seem a little complex, and may not always be required, but is recommended to avoid problems when using the scriptlet more than once on a given canvas.

maketext "trythis"
{
 Text:"<result$>"
 Font: Homerton.Medium
 Size: 60
 colour: &FFFFFF
 border: 10 10
 rubout: 100 &000000
 At: 50 50
}

select "trythis"

export sprite
{
 filename:"<Wimp$ScrapDir>.JCGLtemp"
 CanvasArea:YES
 BlendCanvas:NO
 Mask: 1
}


The above section of the scriptlet creates a text object (black text in a white box) and then saves this as a temporary sprite file called “JCGLtemp” inside your !Scrap application. The name I have chosen here was picked purely to try and ensure that you are very unlikely to already have a similarly named file inside !Scrap.

The next section of the scriptlet stores the width and height of the newly created text object (and hence the width and height of the sprite that has just been saved).

let textwi = .width
let texthi = .height

delete


Remember that the dot variables store values relevant to the currently selected object. Since this is the text object “trythis”, we have now noted its size in the variables “textwi” and “texthi”. The script then deletes the object from the canvas and moves on to asking the user to choose a ‘style’ for the way in which the text and the chosen texture are combined. The result of the user’s choice is then saved in the variable “inv” in the form of the text displayed on the relevant button.

prompt to inv
{
Message:Choose Style?
Button1:Normal
Button2:Cutout
Button3:Plain
}


The script now proceeds to load a copy of the chosen texture onto the canvas and then rename it with the new name chosen by the earlier “repeat until” loop. The renamed result then has its width and height scaled to the same size as the text object which was created earlier. The script for this loading and renaming process is as follows.

loadimage "<CompoBits$Dir>.textures.<texture>"

select "<texture>"

let .leafname = "txtx<txtxn>"

scaleto textwi texthi


Note that provided that !CompoBits has been seen by the filer, the texture is loaded from the “!CompoBits.textures” directory as the variable “<CompoBits$Dir>” will have been set. This avoids the user having to explicitly tell the script where to find files it may need. You can add to the files/directories inside !CompoBits as you wish and use it as a centralised location to hold files which you may wish to load onto the canvas.

The next step is to load the sprite we saved earlier as the BLEND mask for the texture object. Note that Compo requires masks to be 256 level greyscales, but the sprite saved earlier was, by default, a ‘deep’ colour image. Compo will, however, automatically convert the image into 256 grey level format when loading as a sprite. The sprite contains an image of the text shapes created earlier so when it is applies to the texture we will obtain ‘textured text’. This process is achieved using

loadmask BLEND "<Wimp$ScrapDir>.JCGLtemp"


This loads the file and applies it as a mask to the currently selected object, which in this case is the texture we are interested in. Once this has been done we have finished with the temporarily saved sprite file and can delete it using

star "wipe <Wimp$ScrapDir>.JCGLtemp F~C~V"


This uses the composcript command “star’’ which acts as a way to pass an instruction on to the ‘command line’. i.e. it allows the script to launch commands in exactly the same way as you could do by opening a Task Window. Note that this is a very powerful feature and should be used with care. In this case it is used just to wipe (delete) the temporary file we saved earlier into the !Scrap application.

The script can now process the BLEND mask according to the choice the user made earlier. The code for this is as follows.

if <inv> = "Cutout" then
 processmask BLEND invert
else
endif

if <inv> <> "Plain" then
let .shadow = 1

makemask SHADOW copy BLEND
processmask SHADOW antialias smooth
else
endif

end


If “Cutout” has been chosen the BLEND mask is inverted. The result makes the object appear as if the text has been ‘cut out’ from the texture. If “Plain” has not been selected, the object is then given a shadow and the shadow is given a soft edge by applying “antialias smooth”. The script then ends.

The example script can be improved in a variety of ways. There are more flexible ways to choose a font, or deal with a choice of textures. In many cases the flexibility of a menu is more useful than the prompt boxes employed here. However the example as supplied should work, and serve as a helpful example of how the various commands can be used to produce a useful scriptlet that integrates with !Compo. The use of menus will be discussed as part of the explanation of the “Framer” scriptlet.


prevpage.gif - 1296 bytes homecc2.gif - 8Kb nextpage.gif - 1271 bytes


Content and pages maintained by: Jim Lesurf
using HTMLEdit, Compo, and TechWriter.